Wednesday, September 30, 2020

Clean and Simple with Fairy Hugs Sea Horse

   Welcome to the Fairy Hugs Store!  


Please become a follower by signing up on the side bar!  

If you'd like to receive Fairy Hugs Store newsletters via Email 
 
Please visit the Fairy Hugs Store and sign up through the pop up window!  

Click Here!  

I'm so happy to share my DT project this week featuring SeahorsesMini Nautilus, and Mini Scallop Shell as the focal point which can be found at the Fairy Hugs Store!

Without further ado...


For this card, I started by stamping the Mini nautilus, Mini Scalloped Shell, and one of the Seahorses to make a beautiful clustered focal point. The images where stamped with Simon Hurley inks. I took advantage of some die cuts that I had in my stash. The background was stamped using the Fairy Hugs Net image, again with Simon Hurley ink. I popped up the focal cluster and tucked the foliage behind. The front panel was matted onto a teal panel and then to the card base. I added some enamel dots for added interest.


Please come visit us at the Fairy Hugs Store FaceBook Page!!


Tuesday, September 29, 2020

Fairy Hugs Oscar Steampunk Earrings with Roni

 Welcome to the Fairy Hugs Store Blog.

Please become a follower by signing up in the side bar!
If you would like to get the Fairy Hugs Store newsletter via email with updates
please visit the Fairy Hugs Store and sign up using the pop-up window.

Today I wanted to share my latest Fairy Hugs creation...


I love the Steampunk look which is why I instantly fell in love with Oscar when I first saw him. I knew he'd be perfect paired with anything Steampunk hence my Oscar Earrings! While they are quite impressive they are really very easy to make. 

Let's first talk about earring card/holder.  First I colored a piece of white cardstock with a bit of watercolor paint which I glued to a piece of chipboard.  Oscar was stamped then embossed.  I then trimmed around Oscar and dipped the edges first onto a VersaMark ink pad then into copper embossing powder, heat to set.  Finally I made a couple holes and set the eyelets with a Crop-a-Dile tool.


Next the earrings. This is so easy you're not going to believe me when I tell you how quickly they came together. So first - stamp Oscar onto a piece of shrink plastic of your choice x2. Cut around the image leaving an extra bit of space at the top for a hole. Punch a hole in the top with the Crop-a-Dile. Heat to shrink the plastic x2.

Now all you have to do is add your desired jewelry findings - I used copper findings and jet black beads and a couple little copper gears.  


Hard to believe but it only took 20 minutes to make the earrings. 
It actually took longer to make the earring holder.

So are you ready to take the plunge into Steampunk goodness or are you already a Steampunk aficionado?

Supplies:


Be sure to stop by our Fairy Hugs Facebook Group 


Saturday, September 26, 2020

Fairy Hugs - Nautical Fun! Seahorses, Shell and Starfish!

   Fairy Hugs Store  has their own line of stamps, paper, glitter and ink!

Today i would love to share Fairy Hugs Scapes Paper - Playground
By cutting out the center of this paper you can get something that looks like the earth!
Pretty cool, huh?

    So this is super fun and totally made by accident.  I chose to cut out the center of Fairy Scapes Paper - Playground for some interest on top of the Fairy Hugs - Net layer..
and it ended up looking like the earth!
To get the net layer, i did some ink blending using Oxide Ink Faded Jeans and Chipped Sapphire. 
Then i stamped the net around randomly with Chipped Sapphire.
Next i did some fun stamping with Fairy Hugs - Mini Scallop Shell and Fairy Hugs - Mini Starfish.
I used a bit of glue and Fairy Hugs Glitter Powder - Bronze on the Starfish and
For the Fairy Hugs - Seahorses i stamped them with Distress Oxide - Scattered Straw and Embossed them with Ranger Antique Gold Embossing Powder.

I have used the following Fairy Hugs Products:


Please come and visit us at Fairy Hugs Store Facebook Group!

Friday, September 25, 2020

Fairy Hugs - Seahorses

 Welcome to the Fairy Hugs Store Blog!

Please become a follower by signing up in the side bar!

If you would like to get the Fairy Hugs Store newsletter via email with updates, please visit the Fairy Hugs Store and sign up using the pop-up window.  Click here!

 Here is my Fairy Hugs DT Project using Seahorses

I have used the following Fairy Hugs Products:
Seahorses

 
Net


Coral Reef Fairy-Scapes

Shiny Penny Glitter Powder

 Please come and visit us at Fairy Hugs Store Facebook Group!


___
#thefrolickingfairy #fairyhugs #fairyhugsstore #seahorses #underthesea #net #coralreef #fairyscapes #patternedpaper #fibers #yarn #mixedmedia #tim_holtz #sentiments #findthebeautiful #cardmaker #cardmaking #cardmakersofinstagram

Thursday, September 24, 2020

Fairy Hugs Fairy Door


Welcome to the Fairy Hugs Store Blog !

Please become a follower by signing up in the sidebar!

If you would like to get the Fairy Hugs Store newsletter via email with updates

please visit the Fairy Hugs Store and sign up using the pop-up window.

Click here

Here is my Fairy Hugs DT Card/Project using  the feature stamp

 Today I'm sharing my Fairy Hugs DT Card/Project using  the

 Fairy Hugs Fairy Door  StampFairy Scapes Playground and Fairy Hugs Glitter Powder - Ocean.


I have used the following Fairy Hugs Products: 


Please come and visit us at Fairy Hugs Store Facebook Group! (add Fairy Hugs Store FB Group link to name)


Wednesday, September 23, 2020

Red Skies with Fairy Hugs Sunken Ship

Welcome to the Fairy Hugs Store!  


Please become a follower by signing up on the side bar!  

If you'd like to receive Fairy Hugs Store newsletters via Email 
 
Please visit the Fairy Hugs Store and sign up through the pop up window!  

Click Here!  


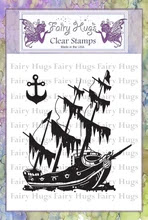
I'm so happy to share my DT project this week featuring Sunken Ship as the focal point which can be found at the Fairy Hugs Store!  
Have you heard the saying, "Red skies at night, sailors delight; red skies in the morning sailor take warning?"  I think it is perfect for this project because I used a Sunken Ship stamp, as ship sailing in its full glory in front of a perfect red sunset.   I love the irony!  

Without further ado...


I decided to make a tag, because, it's a format I tend to stray from, but love them.  This tag measures 4.5in x 6.5 inches.  I started with 120# card stock because I knew I would be adding a lot of ink and wanted it to be strong.  I used a circle die cut to mask an area out for the moon, and then started blending with distress oxide inks.  Once happy with my blend I stamped the Fairy Hugs Sunken Ship image in front of the moon with Raven Pigment Ink, and embossed it with clear EP.  I added the clouds using a narrow makeup brush and Chipped Sapphire Distress Oxide.  For the final touches I added Perfect Pearls to add the stars, burlap ribbon and fish net stocking ribbon.  
   
I hope this inspires you to do something inky today!  You can find the Fairy Hugs Store HERE


Please come visit us at the Fairy Hugs Store FaceBook Page

Tuesday, September 22, 2020

Fairy Hugs Spinner Thanks Card

 Welcome to the Fairy Hugs Store Blog.

Please become a follower by signing up in the side bar!
If you would like to get the Fairy Hugs Store newsletter via email with updates
please visit the Fairy Hugs Store and sign up using the pop-up window.

Roni here and today I wanted to share my latest Fairy Hugs creation...


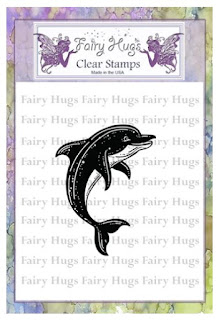
Spinner the dolphin!


I thought it would be fun to make a clean and simple card so Spinner would shine. I found a mat with the word thanks printed on it in my stash so I stamped Spinner so it looked like he was leaping over the top of it. I then used a water stencil and a bit of blue ink to create a swirl of water surrounding him. I then added a bit of Sky Fairy Hugs Powder glitter here and there. 


I then popped this panel onto a light blue card mat and a dark blue card blank. Added a bit of ribbon and called it done! I know some people may not consider this truly CAS but if you've seen some of my other cards this is great. I have not mastered CAS but I'm trying!

Hope you all have a lovely day and thanks for stopping by!


Supplies:


Be sure to stop by our Fairy Hugs Facebook Group 


Monday, September 21, 2020

Fairy Hugs Kissing Fairy


Welcome  to the 
Fairy Hugs Store Blog. Today, it is my turn to share my most recent project with you. Please become a follower by signing up in the side bar!  If you would like to get the Fairy Hugs Store newsletter via email with updates please visit the Fairy Hugs Store and sign up using the pop-up Window.

Today I created a card using the Starry  and the stamp called Kissing Fairy. I used a circle stitched die for cutting out the stamp image and then made two triangle slices with the paper. 


Starry Moonlight Paper                                                       Kissing Fairy   


If you are interested in enjoying more fun with Fairy Hugs, please stop by and join our Facebook Group, Fairy Hugs Store, where you can share your creations.       

                                                                    Thanks for stopping by.