Thursday, April 8, 2021

Fairy Hugs - Zippie's Moonlight Ride

 Welcome to the Fairy Hugs Store Blog.

Please become a follower by signing up in the side bar!
If you would like to get the Fairy Hugs Store newsletter via email with updates
please visit the Fairy Hugs Store and sign up using the pop-up window.

Today I wanted to share my latest Fairy Hugs creation...


Today I wanted to share a card I made using Zippy from the brand new release.

I stamped Zippy using Purple Delight VersaFine Clair ink on the Fairy Hugs Background - Moon Light. It was stamped on a piece of scrap paper using Glamorous VFC ink. The Fairy Wind was stamped behind the bike also using Glamorous ink.  The wheels from the second image were fussy cut then attached to the panel using purple mini brads.

The background was stamped with Leafy Stalks then finished by using the Galaxy stencil and Purple Delight ink.


Be sure to stop by our Fairy Hugs Facebook Group 


Wednesday, April 7, 2021

Fairy Hugs Moana with Canoe

 Hello and welcome to the Fairy Hugs Store Blog.


I had this sheet of woodsy paper and knew it would complement the Leafy Canoe.  Stamping the canoe in green ink, I added brads within the flower centers.  Using my scissors, I cut a small slit in the canoe.   Moana was stamped in black ink and fussy cut.  I then placed her in the canoe.  

Assembling the card, I die cut the word "seek" as  I wonder what Moana is seeking on this trip.


Fairy Hugs Supplies:


Like us on Facebook

Follow us on Instagram: Fairy Hugs Store
 Join our Fairy Hugs Facebook Group here

 Don't forget to include #FairyHugsStore on your projects and tag us at @FairyHugstore so we can be sure to see and comment on your projects!


Sign up to receive Fairy Hugs Newsletters at the Fairy Hugs store.


Thanks for stopping by.


Tuesday, April 6, 2021

Fairy Hugs Heron By the Moonlight

 Welcome to the Fairy Hugs Store Blog.

Please become a follower by signing up in the side bar!
If you would like to get the Fairy Hugs Store newsletter via email with updates
please visit the Fairy Hugs Store and sign up using the pop-up window.

Today I wanted to share my latest Fairy Hugs creation...


I love how quick and easy it is to use the Fairy Hugs backgrounds. They make such beautiful cards with ease.

To create this card I started out by stamping the herons on the Blue Skies Slimline Background. The next step was stamping the Ivy Corner so they were hanging down framing the moon.  I sponged on a bit more brown ink for the sandy beach and created a sea line under the moon with blue ink and a torn piece of paper. Finally glitter and a bit of pen work was added to finish off the scene.


Be sure to stop by our Fairy Hugs Facebook Group 


Monday, April 5, 2021

Fairy Hugs - NEW Release!

 Hello everyone and Happy Monday!! 

Let's see what we can make using Fairy Hugs Store supplies! 

It's a BRAND NEW release!

 Let's create this card.. The background is a Fairy Hugs Background paper - Moon Glow Grayscale. 

Simple stamping and embossed with clear embossing powder.
A tiny bit of Distress Oxide Ink - Milled Lavender for a hint of color.
I added some white gel pen dots for highlights!
 
 
Fairy Hugs Store Supplies:

 Like us on Facebook
Follow us on Instagram: Fairy Hugs Store

 Join our Fairy Hugs Facebook Group here
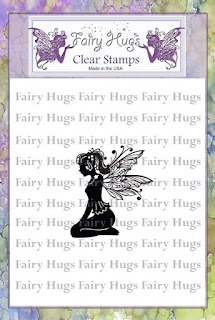
 Don't forget to include #FairyHugsStore on your projects and tag us at @FairyHugstore so we can be sure to see and comment on your projects!

Sign up to receive Fairy Hugs Newsletters at the Fairy Hugs store.

 
Thanks for stopping by!

Sunday, April 4, 2021

Fairy Hugs Interactive Card

Hello and welcome to the Fairy Hugs Store Blog.


Using an interactive die from TLC Designs, I used that as the basis for this card.  If you move the dial at the bottom of the card, the Swan and Moana move towards each other, then away from each other.     Both the Swan and Moana as well as the log were fussy cut.

To create the scene, I inked the panel with oxide ink.  The Hanging Vines were stamped on the lower half, then the Galaxy Stencil was used to create stars on the upper half.   Moon Tree branches were stamped above the center point.  Moana's wings were colored with Copic Markers and some glitter.


Fairy Hugs Supplies:


Like us on Facebook

Follow us on Instagram: Fairy Hugs Store
 Join our Fairy Hugs Facebook Group here

 Don't forget to include #FairyHugsStore on your projects and tag us at @FairyHugstore so we can be sure to see and comment on your projects!


Sign up to receive Fairy Hugs Newsletters at the Fairy Hugs store.


Thanks for stopping by.


Friday, April 2, 2021

Fairy Hugs - Azalea enjoying her day!

  Hello everyone and Happy Friday!! 

Let's see what we can make using Fairy Hugs Store supplies! 

As you know, Fairy Hugs - Azalea is one of my favorite Fairy Hugs stamps!
 

For this project, i started out with a Fairy Hugs Background paper - Lavender Dilly. What i did was cut out the center of the paper. (Save the outside to use on another card)
I needed figure the placement of Fairy Hugs - Azalea so her wings would fit on the circle as she sat on the Fairy Hugs - Fairy Swing.  The best way to do that is to use the acrylic sheets that come with the stamps.  I place them both down on the circle and "eye" where they go using my stamping platform.  With the stamping platform i can always adjust the stamps to line up with the acrylic sheets.  It doesn't have to be perfect. I stamp both of the stamps and heat emboss them with clear embossing powder.  Now i arrange the Fairy Hugs - Fairy Scrolls around the outside to make the swing look like it is in tree.
Now you can stamp the tops of the Fairy Hugs - Fantasy Flowers below Azalea.   So what is fun about the Fairy Hugs stamps is that there are places where you can color in the images if you want.  So for Azalea, i colored in her wings with Prismacolor pencils to match the colors of the paper. I added the same color to the Fantasy Flowers and a bit to Azalea's flowers in her hair.   I matted this circle on black paper.  Have you noticed the background?  It is a Fairy Hugs Stencil - Pebble Beach.  I used Distress Oxide Ink - Pumice Stone.  I used one layer to cover the entire background and came back with the stencil and the same ink to make it look subtle!  I love the stencil look in the background! Now you can layer up your circle and stenciled background.  I did mat the stenciled background on metallic paper and placed it all on a black card base!
 
Fairy Hugs Store Supplies:


Like us on Facebook
Follow us on Instagram: Fairy Hugs Store
 Join our Fairy Hugs Facebook Group here

 Don't forget to include #FairyHugsStore on your projects and tag us at @FairyHugstore so we can be sure to see and comment on your projects!

Sign up to receive Fairy Hugs Newsletters at the Fairy Hugs store.

 
Thanks for stopping by!

Thursday, April 1, 2021

Fairy Hugs - Chatting with Azalea

 Welcome to the Fairy Hugs Store Blog.

Please become a follower by signing up in the side bar!
If you would like to get the Fairy Hugs Store newsletter via email with updates
please visit the Fairy Hugs Store and sign up using the pop-up window.

Today I wanted to share my latest Fairy Hugs creation...


Azalea is chatting with some of her favorite woodland friends in the deep green fairy forest.

To create this card I started out by stamping the large log on the Fairy Hugs Background Moss & Stone using a combination of Pinecone and Acorn VersaFine Clair Ink. Next Azalea was stamped so she was perched on the log.

Several different trees were stamped in the background using Nocturne, Shady Lane and Acorn inks.

The little hedgehogs were stamped on a scrap of brown cardstock, fussy cut then popped onto the log.

Fairy Hugs Supplies:


Be sure to stop by our Fairy Hugs Facebook Group